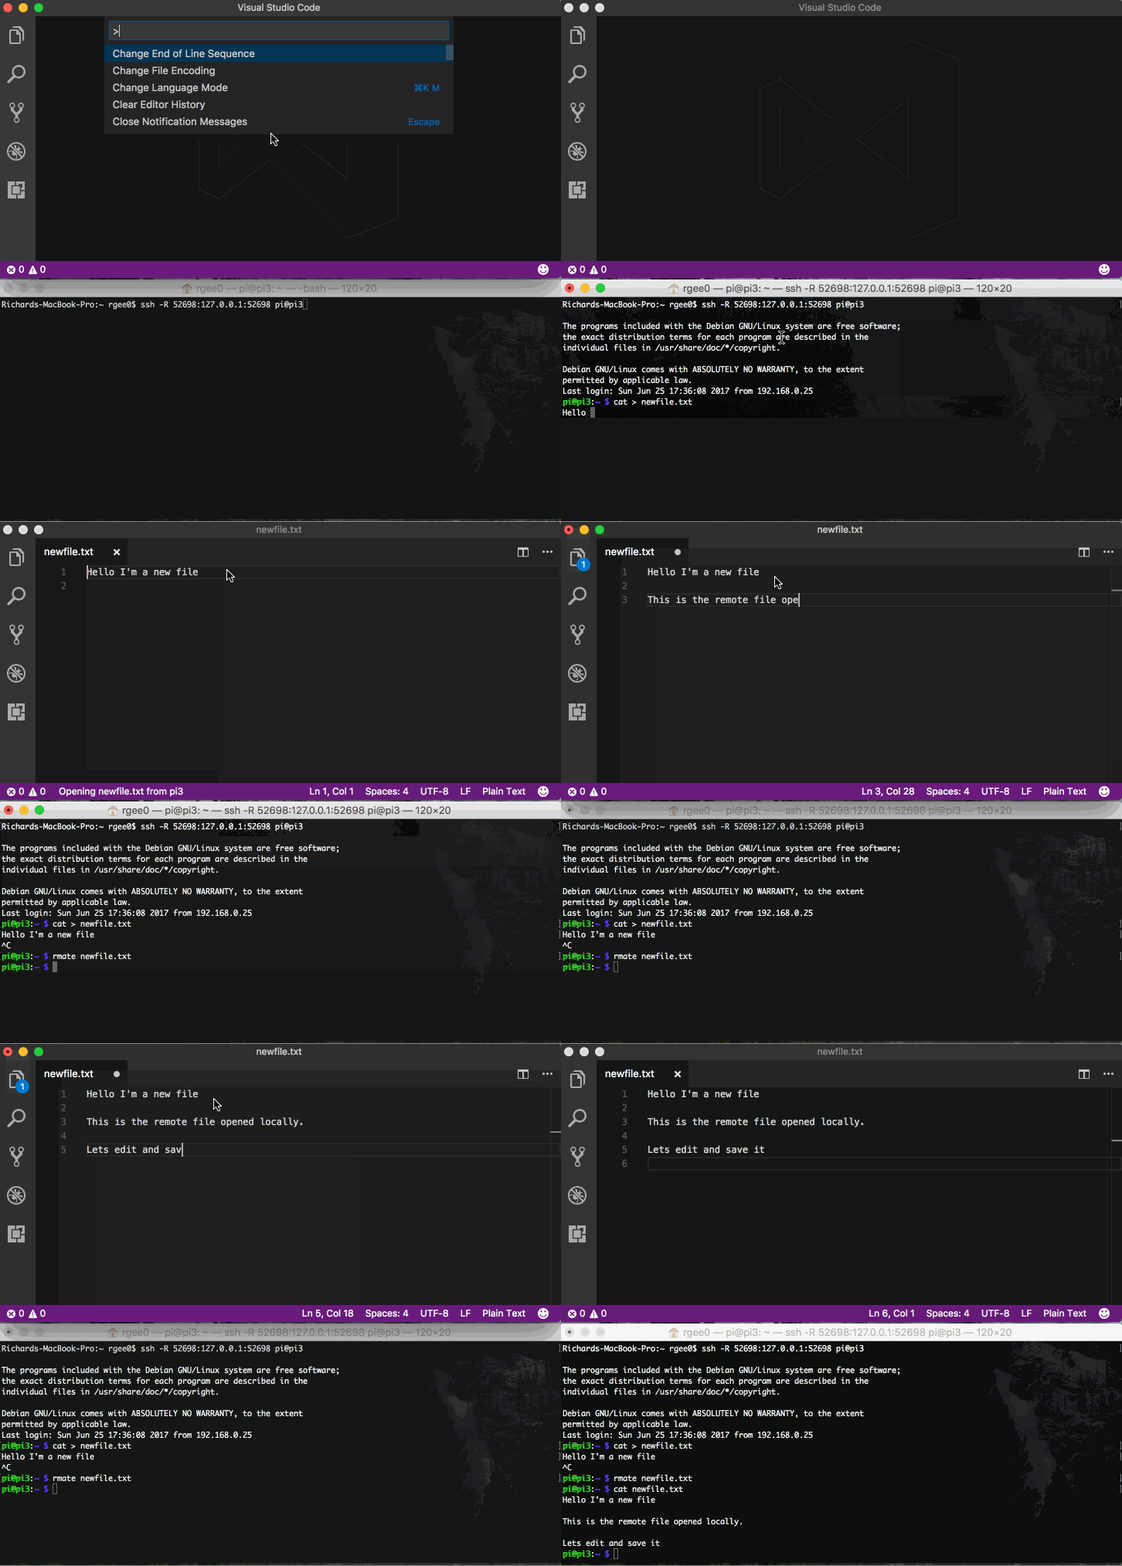
Working, as I frequently do, on small projects on headless Raspberry Pis it can sometimes be a challenge to establish an efficient flow while developing. On one hand you could work locally in your favoured editor and benefit from the increased efficiency this provides, but this is soon offset with the transferral of code every time you wish to test it. Alternatively you could develop remotely through a terminal connection using vi, vim, nano, etc and gradually come to terms with their idiosyncrasies.
Until recently I was managing to do both; I was working on Windows and would use WinSCP to connect to a Pi and then use the built in menu option within WinSCP to 'Edit with' to open the remote file locally in VS Code. I could then make my changes, save, WinSCP would write the changes to the remote file and I could then run build/run the resulting code via an ssh connection.
I'm now working on a Mac and my initial approach was to run Samba on my Pis and mount the Pis as local drives. This works but I've found it to be less reliable than my previous method, and so I started looking into other means.
VS Code has a remote extension
One of the strengths of VS Code is its extensibility and the community support thereof, so its perhaps of little surprise that the described problem has already been solved. There is an extension in the market place called Remote VSCode
Installation is simple, either search for it through the extensions panel or open Go -> Go to File from the menu (⌘P) and type:
ext install remote-vscode
Once installed the server will need starting - ⇧⌘P and then look for:
Remote: Start Server
Configure the Pi
OK, so have got the extension enabled locally, but how does the Pi know about it? Well, we need to do some configuration to enable this. When connecting to the Pi we can also take the opportunity to set up an ssh tunnel for the Pi to redirect the remote commands back into the server running within VS Code:
ssh -R 52698:127.0.0.1:52698 pi@<pi-ip-address>
Once connected we need to install one of the rmate options from the extension's homepage. I chose the python version after the bash version failed to install:
sudo pip install rmate
Then with the server running locally within VS Code we can call rmate <file> on the Pi and the file will open within VS Code.

Further Refinement
Adding the ssh tunnel element to the command when initiating the connection may be cumbersome and become difficult to remember. Fortunately, through the use of a ~/.ssh/config file we can ensure that the tunnel is configured every time we create a connection to our Pi.
Host pi3
    HostName <pi-ip-address>
    User pi
    ForwardAgent yes
    RemoteForward 52698 127.0.0.1:52698
Now, once we have started the server within VS Code, all we need to run is ssh pi3 and the resulting connection will have our ssh tunnel automatically configured.
Limitations
Currently rmate supports only files, it doesn't yet support directory structures; so this is an approach only really for smaller projects. If you're hacking about with a Blinkt!, or Mote then why not give it a go? You can even run rmate with sudo allowing you to work on restricted files like wpa_supplicant.conf.
